How to Weld Letters in Silhouette Studio + Free Love Block Design with Apple SVG & DXF.
In this tutorial I will be showing you how to use the weld tool to create a letter block in your Silhouette Studio Software. We will also be utilizing the Offset tool to give our design a little more depth.
For the purpose of this tutorial I will be adding an apple to the design in place of the O in LOVE. This tutorial will work if you are using all the letters of the word LOVE, you will just need to arrange the O to weld with the other letters.
Open your Silhouette Studio Software as usual.
Type out the word you want to use for your block using the Text Tool, that’s the tool to the left of the Silhouette Studio with the letter ‘A’ . Also, if you are using another design in place of the O like I am doing, open your design and place that in the same design window.
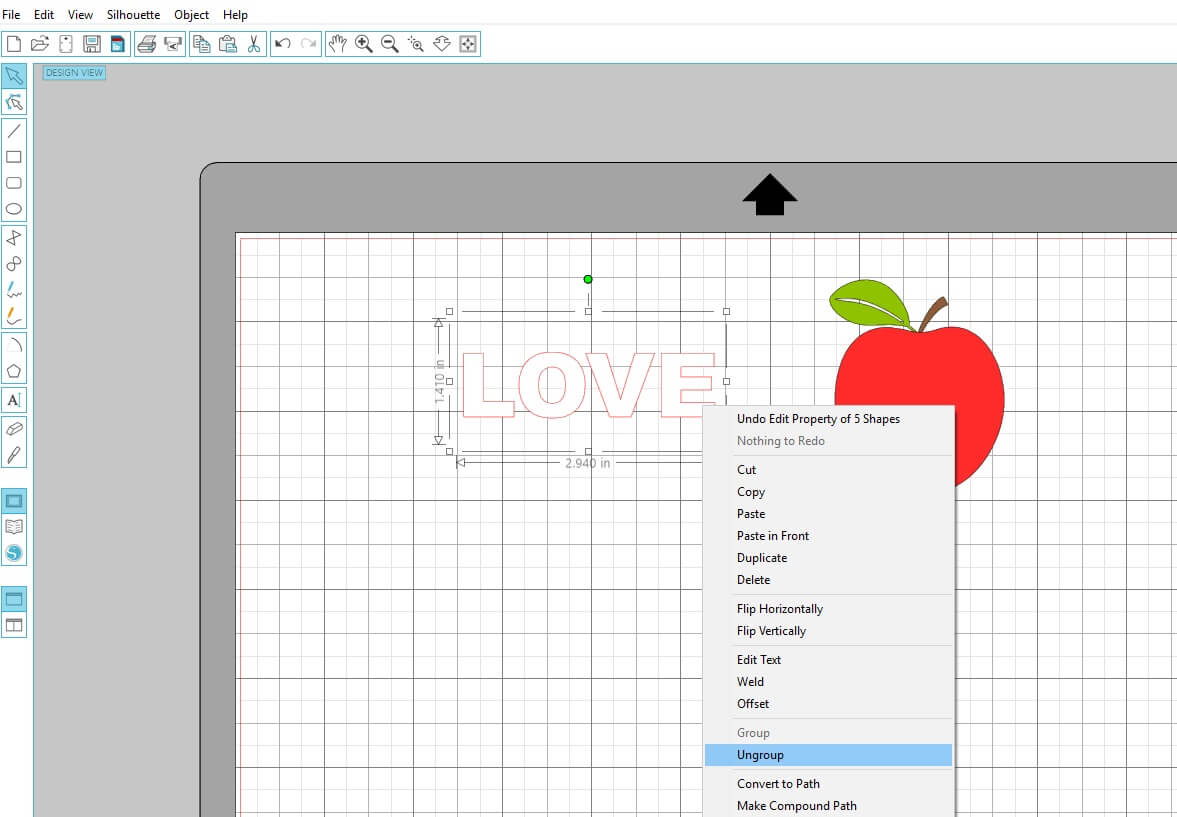
 Ungroup your letters by right clicking on them and selecting ungroup.
Now that the letters have been ungrouped, place the letters in a block formation as shown, overlapping slightly, you may need to zoom in to adjust where the letters meet. If you are adding a design in place of the O, position this design until you are happy with it’s placement. I have used the rotate option to angle my apple slightly. (Rotate option can be found under Object, Rotate)
Once you are happy with your design layout, you can go ahead and weld your letters, to weld, select the letters you want to weld for this design, right click and select weld. The weld tool can also be found at the bottom left of the Silhouette Studio window. (See below image) You can see when the letters have been welded as the overlapping lines are no longer visible.
I wanted to keep the apple design separate so I can have that in a different colour. As that is the part of the design I want to stand out most.
Your design is now ready to add cutting lines, however, I have added this extra step, using the offset tool we can create a ‘shadow’ layer, this acts as a background for this design.
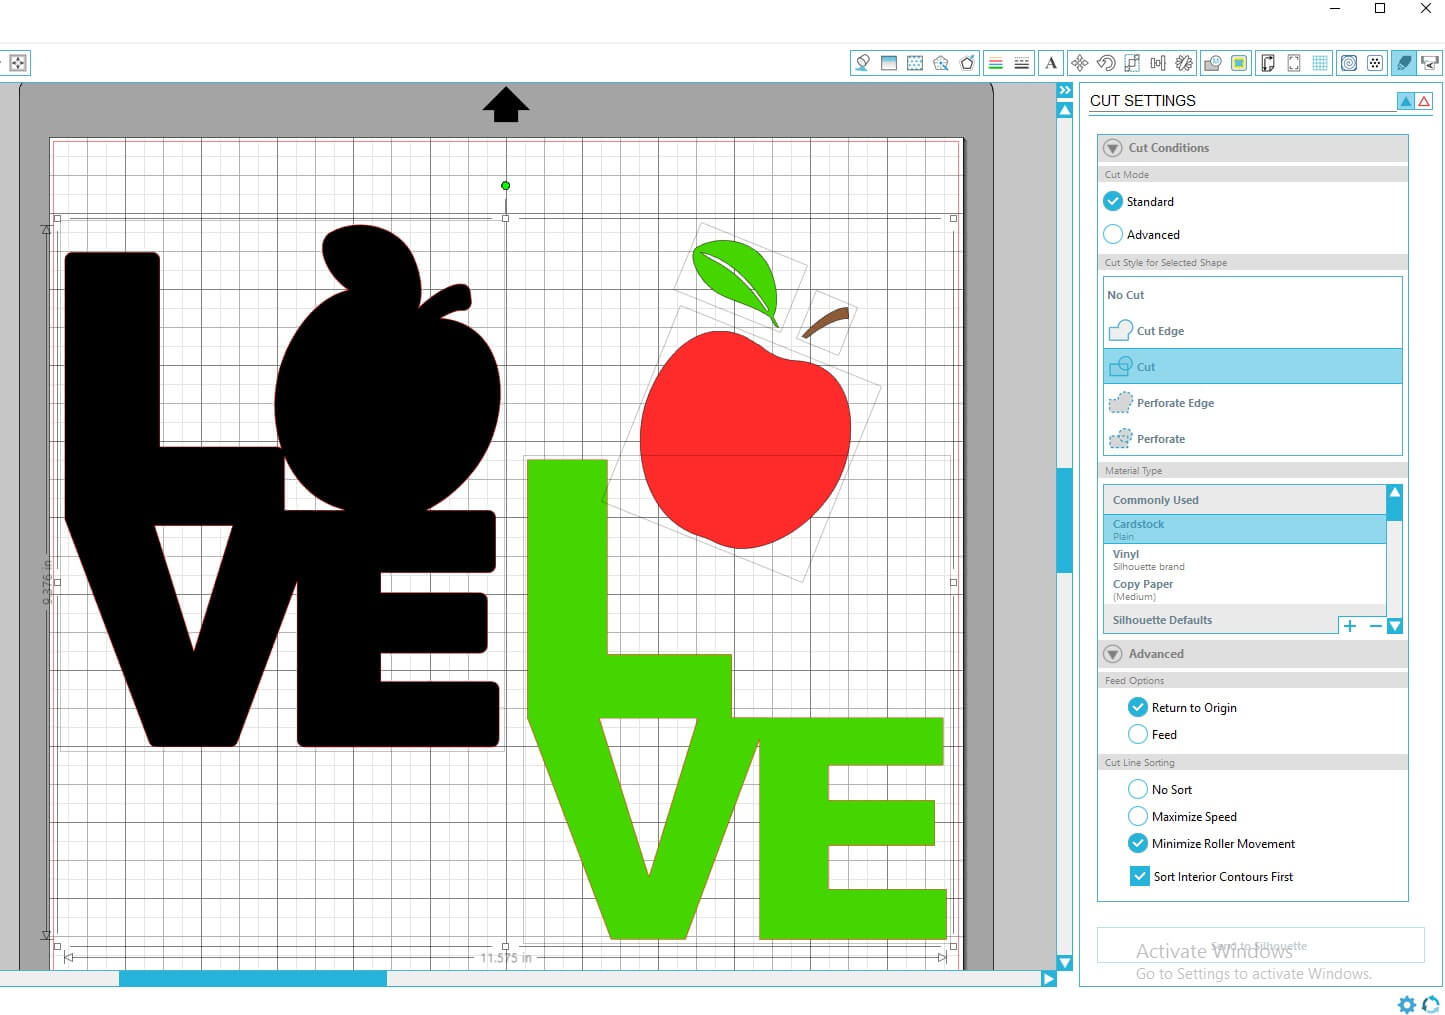
You can access the offset tool by either clicking on object and choosing ‘Offset’ from the menu, or the icon to the bottom left of the screen which shows 3 nesting circles. (See above image). Select the whole of your block design, in the Offset Tool box, which will appear to the right of the screen, select ‘Offset’ this creates an ‘outer offset’ now adjust the distance according to your preference. Click apply, and the overlapping shapes will automatically weld together. I filled my offset in black to take a closer look and to see if I was happy with the overall layout, you can undo and re-apply the offset if you want to adjust the offset.
Once you have your ‘shadow layer’ the way you want, you are ready to send to cut. As we have created our design in Silhouette Studio, cut lines should already be added, however if you are using a file other than from the Silhouette Design Store, like the apple in this design, you will need to add cut lines, these options are located in your cut settings. You will also need to separate the layers as shown below. Once you have done this and selected the material you are using, you can send to cut.
Thank you for reading, I hope this tutorial has helped and inspired you to get designing and creating with your Silhouette Studio Software.
Keep Scrolling for a freebie download link.
Freebie is for personal use only please do not re-sell the file as is. Included in the download is 1 SVG and 1 DXF file. The DXF File will work with the Basic edition of Silhouette Studio.
If you want to purchase the commercial use license for this file and all our other freebies visit our Etsy store
Thank you for reading, if you liked this then please share, pin or comment below.
Vicky

