Design a Monogram Pencil in Cricut Design Space + Free SVG & DXF File.
It’s the end of school year here in the UK, although I know those in the US (where most of my awesome customers are from) are getting ready for Back to School. This tutorial is perfect for end of year, Back to School projects or even if you just love monogramming and pencils…..
In the following tutorial I will show you how to design your own monogram pencil in Cricut Design Space, don’t forget to download the free SVG/DXF at the end of this post.
Enough of me chatting….Lets get started…..
1; First things first, open you Cricut Design Space Software and log in as usual and start a new project.
Draw 3 rectangles, this 3 rectangles are the ‘eraser’ the ‘metal holder’ that hold’s the Eraser to the pencil, and the pencil itself (minus the tip as we will add that later). These can be any size you want them to be.
I have found that this is the easiest way to design the pencil in Cricut Design Space, as i noticed when using the sliced tool, once I sliced the rectangle i couldn’t then re-slice to make another rectangle.
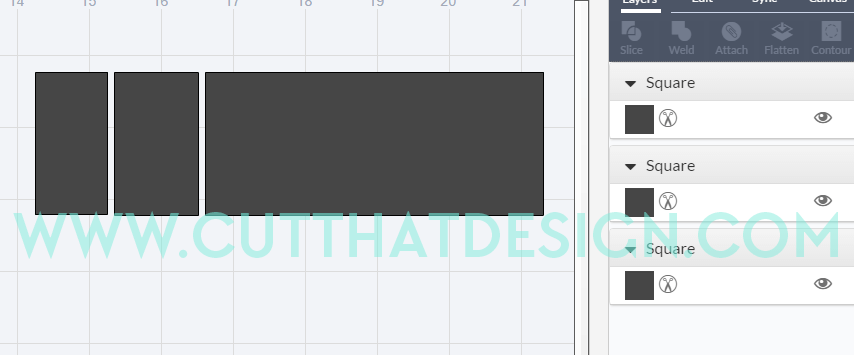
Draw a rectangle, rotate it by 90 degrees and position it against the ‘pencil’ end of the rectangle (as show). Adjust the height to have it match with the height of the rectangles.
I’ve changed the colours to match those close to a pencil as possible, this is my personal preference and you don’t have to change the colours if you don’t want to.

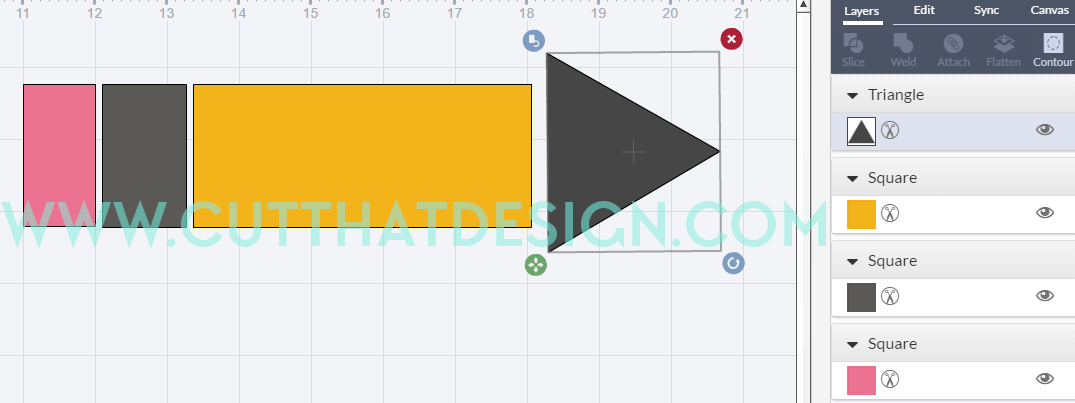
2; Draw a square and position it over the tip of the triangle (as shown) – you are creating the ‘tip’ of the pencil so position enough so that when it is sliced it will look like the ‘tip of a pencil.’
Select the triangle and the square and click slice.


Delete any excess parts that have been sliced, you only want to be left with the grey portion of the tip.
You’ve now designed your pencil in Cricut Design Space!! How awesome is that? Well you can either leave it as it is and send it to cut, or carry on to the next step and design a monogram pencil.

3; To make the monogram, draw a circle and position it in the centre part of the pencil, as shown.
Select the circle and the rectangle and click slice

Delete the circles which have been sliced in the centre of the pencil.

Ta! Da! You’ve created a monogram pencil. Quick and easy! – Scroll to see how to make another type of monogram.

This next monogram you will ‘cut out’ the middle using a circle.
Draw a circle again, adjust and position it so it overlaps the height of the pencil. Select the middle part of the pencil and the circle and click ‘slice.’

And here it is…another type of monogram for you to add a monogram font too. You can use this tutorial for any design you make in Cricut Design Space and not just for this pencil design.

The monogram alphabet used in the below design is from my own collection and can be purchased from my ‘The Hungry JPEG’ store here: www.esidesigns.com/smoothcircle monogram

Keep scrolling for the freebie link…..
This weeks Free SVG/DXF files are the below Pencil Monogram Designs. I design all my files in Adobe Illustrator where I then convert too SVG and DXF files. In my tutorials I like to show you how you can create similar Designs within the Cricut Design Space software. Files are for personal use only.

Thank you so much for reading, I really hope this post has inspired you to experiment with designing in your Cricut Design Space Software. If you want to stay up to date with my tutorials and freebies then please feel free to follow me on: Pinterest,Facebook or Instagram.
Happy Crafting
Vicky xx


