
How to convert a JPEG of your own sketch in to a cut design in Silhouette Studio
I’ve got a nice fun tutorial for you today, I’m going to show you how you can convert your own drawings from a JPEG in to a cut file. How cool is that?
I’m going to start with a simple sketch design, well it wasn’t simple to begin with, this was my original sketch (I have gone over it with pen to make it easy to trace in my vector software);

 For this tutorial I only wanted to use the outline of the bird, and once I draw I’m no good at replicating the same design (that’s why I love working with Vector software it enhances your creativity that little bit more).
Using some tracing paper I have traced the outline of the bird, and added an eye (the image below appears a little blurry because the tracing paper is over the original design. To trace I have used a Black Pilot Drawing pen although fine liner pens work just as well.

If you have a scanner you can scan your traced design, alternatively you can use your phone or camera to take a photo and upload it via dropbox or another file sharing website. You could also email it to yourself, whichever is easiest for you. Once you have your file, save it somewhere on your computer, and follow the next steps to preparing your sketch for cutting.

Click here for a guide on how to open files in Silhouette Studio and navigate to step 2.

Open your scanned/downloaded image in Silhouette Studio

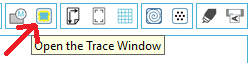
Click on the Trace Button to the top right of Silhouette Studio;
The ‘Trace’ dialogue box will appear, click on select trace area and draw a box around your image.


Under ‘Apply Trace method’ click on the first Trace option (which just says ‘Trace’). Your image will look a little something like the image on the left, where there are red lines on the inner and outer parts of the design. Move the design so the traced part is separated from your original Sketch. Delete your sketch.


To create a solid bird design we need to delete the inner part of the bird, so in order to do that select the newly traced image, right click and select ‘Release Compound Path’. Delete the inner part of the bird.
Next, Select the eye and bird, right click and select ‘Make Compound Path’.


Here’s the completed Bird design, with a fill colour. Your design is almost ready to cut, don’t forget to add your cut lines!


Here’s the final sketched design cut with the Silhouette Cameo, I’ve used 160gsm cardstock. Settings were Blade: 5, Speed 3, Thickness 33, I would definitely recommend doing a test cut and playing around with the settings. (I admit, I didn’t do a test cut and messed up a few times….oops!)

I know the design here could be edited so it looks a little more ‘perfect’. If you want to make adjustments to your traced design, maybe a line or two looks a little crooked and you want it straight, or you want a smoother edge. This is where the edit points tool comes in. Check out this really useful tutorial from the Silhouette America You Tube channel on how to use the Edit Points tool.
Thank you so much for reading, I really hope this post has inspired you to get your pencil out and sketch a design you can upload to Silhouette Studio to cut, or even if you have a sketch lying around (I have loads!). Feel free to share your creations with me on Pinterest,Facebook or Instagram, I’d love to see ?
Happy Crafting
Vicky